
How to Install WordPress Using Filezilla

Among the many notable features of WordPress is its ease of installation. Many web hosting companies offer one-click automatic installation. However, for those who need to install it by themselves, the following are what you need to have and to do to be able to successfully install the WordPress CMS on your web server.
What you’ll need:
- • A Filezilla FTP client which you can download here.
- • The latest version of Wordpress which you can get here.
- • Your FTP login details – ftp hostname, ftp username, and FTP password
- • Your database login details – database name, database username, database password, and database host
Both the FTP and the Database details are available in your Control Panel or cPanel.
What you need to check:
- • Make sure that the hosting package you’ve purchased from your web hosting company supports PHP and MySQL database – WordPress is PHP-based and it requires the use of MySQL database
- • Install Filezilla
- • Unzip the WordPress file you have downloaded and save it on your desktop for easy access
Uploading WordPress Files Using FileZilla
- • Open your FileZilla program
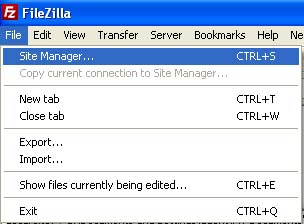
- • Click on File>Site Manager
- • Click on “New Site” on the Site Manager Dialog Box
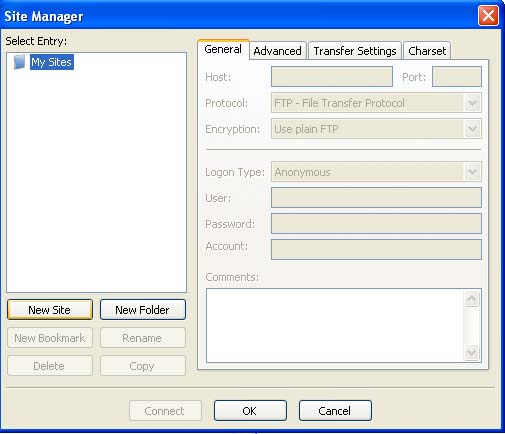
- • Enter the FTP login details of your webspace so that FileZilla can know the remote directory where to upload your website files

Host:your FTP hostname (usually this is something like ftp.domain.com)
Port: 21 (or you can leave it blank)
Server Type: FTP – File Transfer Protocol
Encryption: Use Plain FTP
Logon Type: Normal
User: Your FTP username
Password: Your FTP password
Account: Leave it blank
- • Configure your local directory settings so that FileZilla will know where your local files are located
Click on the “Advanced” tab on Site Manager.

Server Type: Default (Autodetect)
Bypass Proxy: unticked
Default Local Directory: where you save your unzipped WordPress folder
Leave other options as is and then click on the “Connect” button.
Once you get connected, your FileZilla interface should look like the image below:
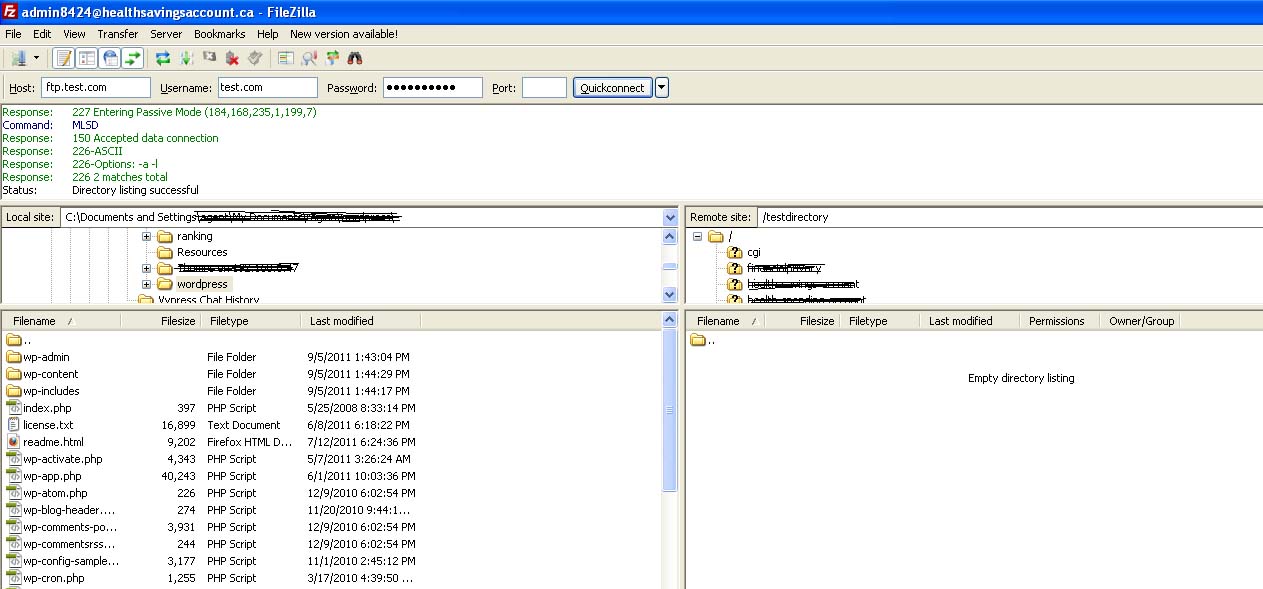
Your local directory is the one on the left pane, and your remote directory is the one on the right pane.
Note: If you encounter connection trouble, double check your FTP configuration settings. You may also contact your webhost to make sure that you have the correct details.
- • Transfer files from your computer (local directory) to your webspace (remote directory)
Locate your WordPress folder and double click on it. Highlight all files, right click, and then click “Upload”. All contents of the WordPress folder will be automatically uploaded from the local directory to the remote directory.
Configuring Your WordPress Site
You now have your files ready on the server. The next thing you should do to complete the installation process is to configure your WordPress website details.
- • Visit your website: http://www.domain.com. A wordpress installation page should come up.
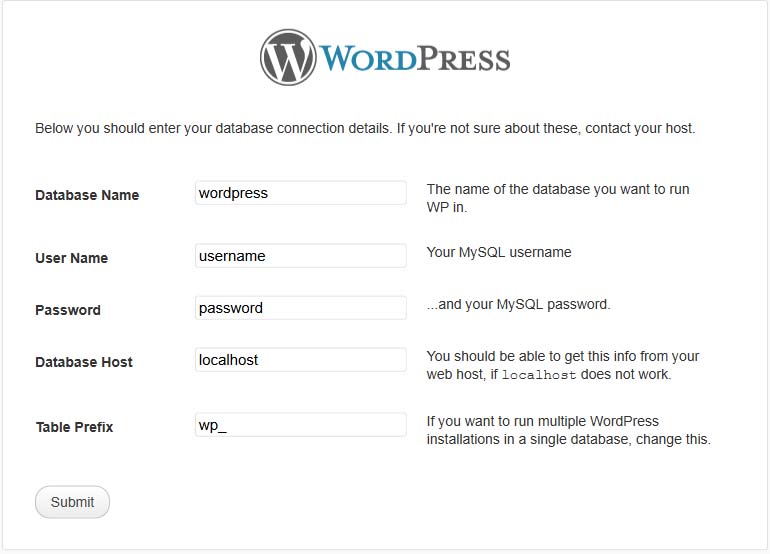
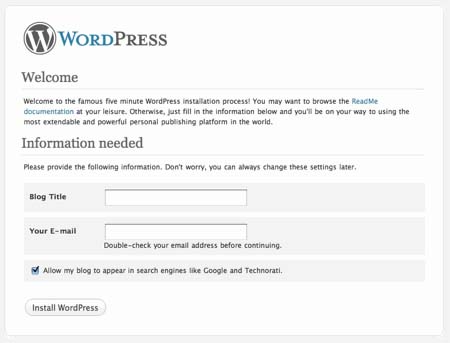
Just fill in the fields with the correct details and then click “Install WordPress” to finish the installation process.


